22. OpenPLX
Note
This feature is under development and is subject to change. Backwards compatibility cannot be guaranteed.
OpenPLX is a domain-extensible language for simulation and autonomy. See OpenPLX documentation for more details about OpenPLX.
AGX Dynamics for Unreal has support for importing and simulating OpenPLX models, see Importing OpenPLX Models for details about importing an OpenPLX model.
The OpenPLX model is mapped to AGX Dynamics objects using the AGX Dynamics agxopenplx::OpenPLXToAgxMapper before being imported.
To control or acquire data from a model, Signals (connected to Inputs and Outputs) can be used, see OpenPLX Signals for more details. It is currently not supported to create OpenPLX models from within the Unreal Editor nor to export a model to an OpenPLX file.
Some object types, like Drive Train, are not added to the Blueprint at import, but is mapped at runtime instead, see OpenPLX Runtime Mapping for details.
For this reason, the openplx file along with any of its dependencies (for example mesh files) are copied to a <project_dir>/OpenPLXModels/<model_name> directory so that they can be loaded at runtime.
See Importing OpenPLX Models for more details.
It is possible to create and use custom OpenPLX bundles as well, see User defined OpenPLX bundles.
Try out the OpenPLX level, included in the Tutorial Hallways Demo Project
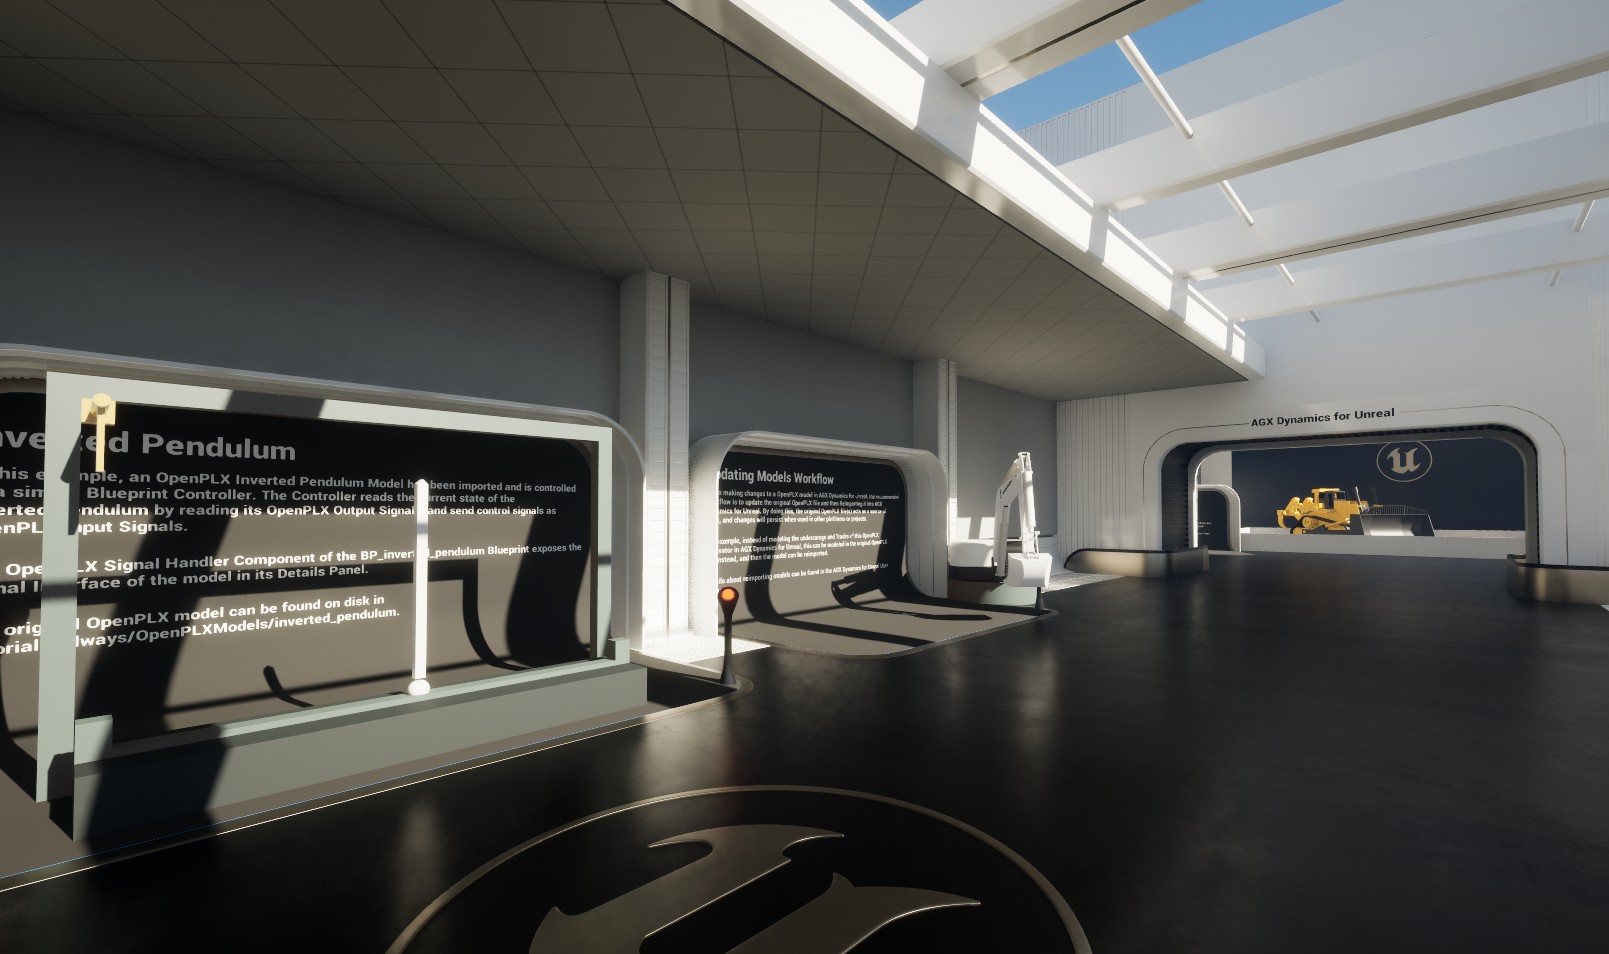
The OpenPLX level of the Tutorial Hallways demo project.
22.1. OpenPLX Signals
The main way to interact with a simulated OpenPLX model is through Signals. A Signal is a runtime object that connects either to an Output or an Input of the model. In other words, signals themselves are not part of the model description, but Inputs and Outputs are. Signals can be created at runtime and connect to these Inputs or Outputs to transfer information to and from the simulated model.
In OpenPLX, one can define a Signal Interface where aliases (short names) for Inputs and Outputs can be specified. This is an example snippet of a Signal Interface of an OpenPLX file:
signal_interface is Physics.Signals.SignalInterface:
      enable: true
      linear_speed_input is Physics.Signals.Input: cart_motor.target_linear_velocity_input
      angle_output is Physics.Signals.Output: hinge.angle_output
The Inputs and Outputs of the Signal Interface (as well as all other Inputs and Outputs) can be seen in the Details Panel of the OpenPLX Signal Handler Component:
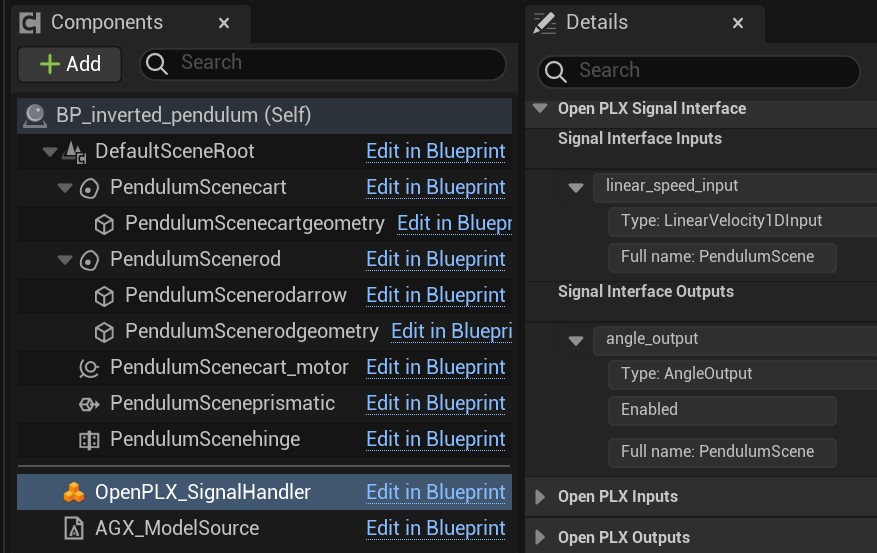
Inputs and Outputs seen in the Details Panel of the Signal Handler Component.
To send information to an Input or read information from an Output, one needs to create a Signal that connects to that Input or Output, and a value of some type can be associated with that Signal.
In AGX Dynamics for Unreal one does this by calling one of the Send or Receive functions that takes as input a value and an Input or Output, or the name or alias of an Input or Output.
These functions automatically create the appropriate Signal so that the information is propagated correctly to or from the simulated model.
Internally, the Signals are passed to instances of agxopenplx::InputSignalListener and agxopenplx::OutputSignalListener which are automatically created at runtime and are responsible to propagate the Signal to or from the simulated model.
Below is an example of how to send a Signal for a linear_speed_input Input seen in the snippet above, in Blueprint at each Simulation Step Forward during Pre:
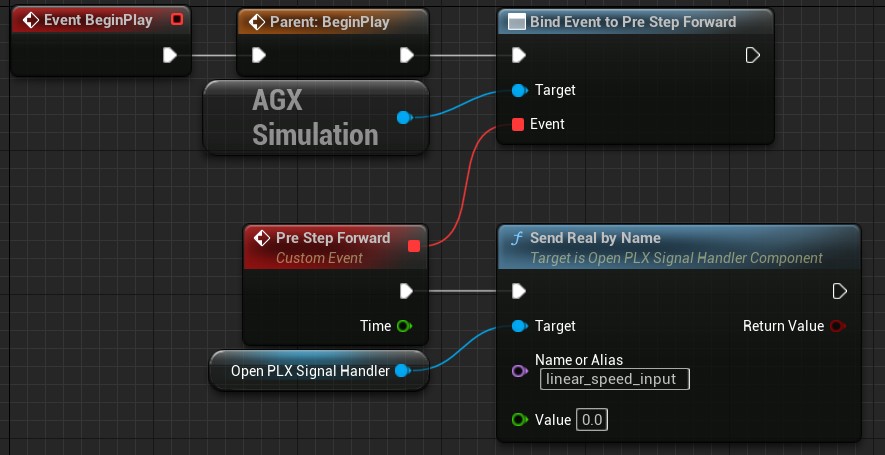
Sending a Signal during Pre Simulation Step Forward.
Notice that we use the Send Real function here because the linear_speed_input Input is of Real type.
If it would have been of vector type, we would use the Send Vector function instead.
There are alternative variants of all Send and Receive functions that takes an Input or Output instead of a name or alias.
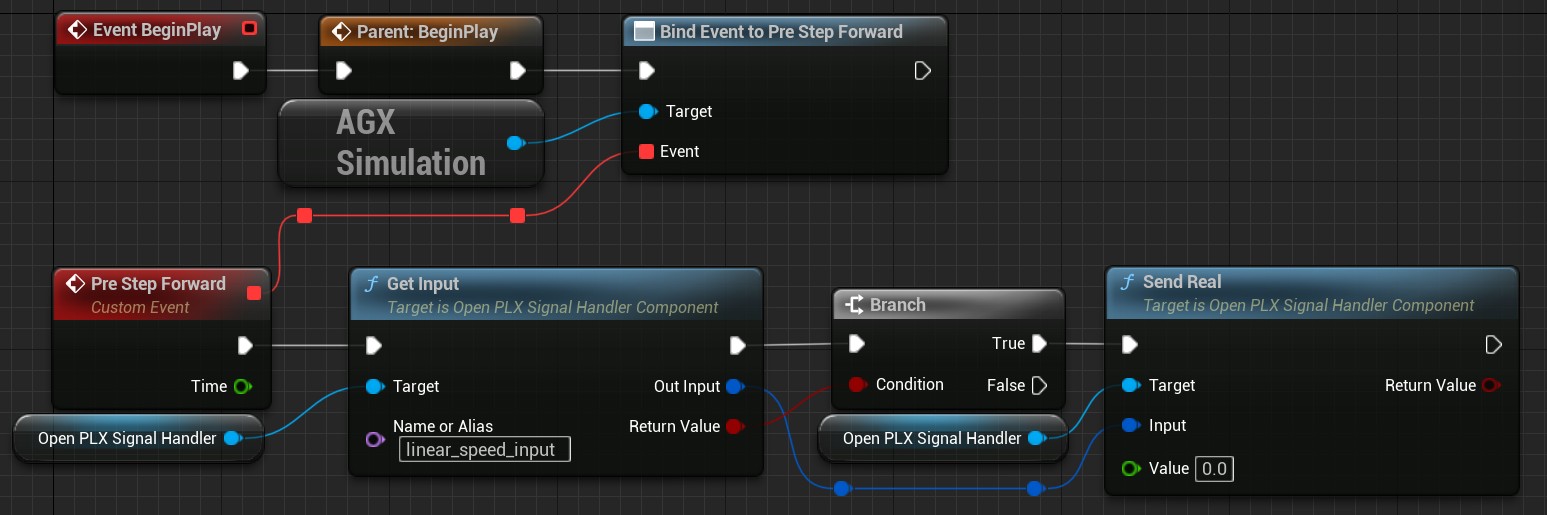
Sending a Signal by a manually selected Input.
Using these directly includes more steps than their corresponding Send/Receive xxx By Name functions as can be seen in the image above, but they enalbes one to store Inputs or Outputs in variables meaning no lookup is needed when calling the Send or Receive functions.
Similarly, below is an example of how to receive a Signal for the angle_output Output seen in the snippet above, in Blueprint at each Simulation Step Forward during Post:
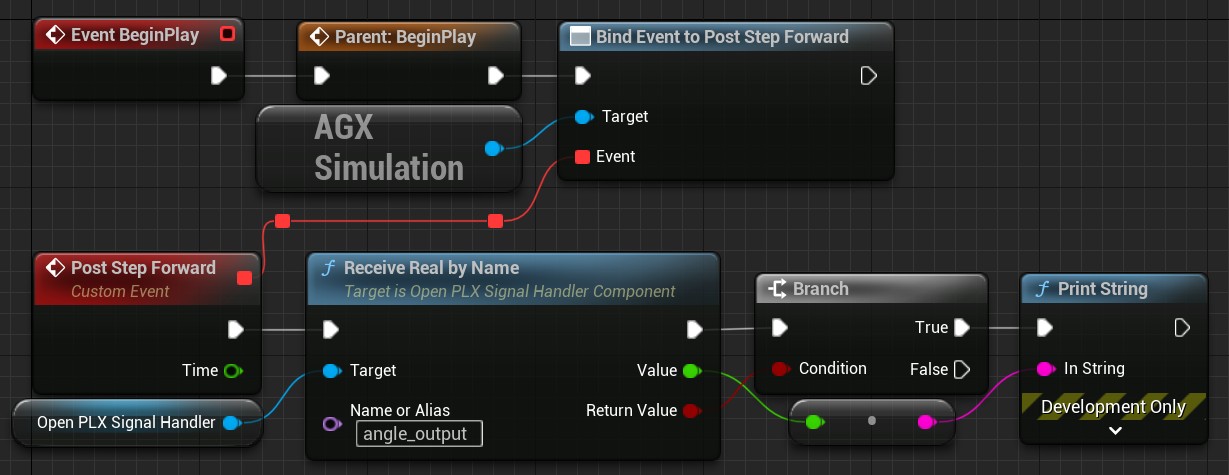
Receiving a Signal during Post Simulation Step Forward.
Notice that we use the Receive Real function here because the angle_output Output is of Real type.
If it would have been of vector type, we would use the Receive Vector function instead.
22.1.1. Control Interface
In addition to the Listener-based signal propagation implementation described above, OpenPLX provides a newer implementation called Control Interface. The Control Interface implementation can provide higher performance when dealing with many signals, or with signals that include a large amount of data such as lidar point clouds. To use the Control Interface implementation use the Send and Receive functions that include Interface in their name, such as Send Real Interface or Receive Vector Interface.

Note
The Control Interface functionality is currently experimental in AGX Dynamics for Unreal. A future version of AGX Dynamics for Unreal will make the Control Interface path the default, meaning e.g. Send Real will then use Control Interface implementation instead of the Listener implementation.
22.2. OpenPLX Runtime Mapping
When an OpenPLX model is imported, it is first mapped to AGX Dynamics objects using AGX Dynamics agxopenplx::OpenPLXToAgxMapper and is then imported to a Blueprint.
Most objects are mapped and represented as AGX Dynamics for Unreal Components, but some objects, like Drive Train does not have an in-editor representation.
Instead, these objects are created and mapped at runtime.
How this works is that the .openplx file is loaded again (from the copy in <project_dir>/OpenPLXModels/<model_name>), usually during Begin Play, and the objects not represented in the Blueprint, such as Drive Train, are created and added to the Simulation automatically.
Since these objects are dynamically created in runtime, the way to interact with them is through signals, see OpenPLX Signals for more details.
22.3. User defined OpenPLX bundles
It is possible to use custom (user defined) OpenPLX bundles with AGX Dynamics for Unreal.
Simply place the bundle inside a direcory OpenPLXUserBundles in the root directory of the current Unreal Editor project, i.e. the bundle should be placed in <project_dir>/OpenPLXUserBundles/<bundle_name>`.
If a working bundle is placed in that directory, it will automatically be used when importing and simulating OpenPLX models and it will also be included in standalone package builds.
Remember to also list the bundle as a dependecy from the OpenPLX model using it. This is normally done from a OpenPLX config file.
For more details about working with bundles in OpenPLX, see the OpenPLX documentation.
22.4. Limitations
All dependecies (such as mesh files, .agx files, etc) must be located in the same directory or in a subdirectory of the .openplx file that is to be imported.
In other words, references to resources pointing to a parent directory, e.g. import @"../../../models/openplx/bulldozer.agx" as AgxBulldozer is not supported.