28. Importing a Model
The AGX Dynamics for Unreal import feature is accessible from the AGX menu in the top Menu Bar and the File tab of the AGX Mode.

The import options are accessible from the AGX top menu bar item.
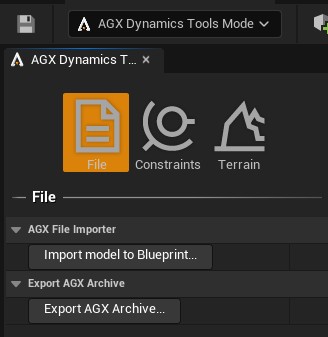
The import options are accessible from the File tab of the AGX Mode.
When importing an AGX Dynamics archive (.agx), OpenPLX (.openplx) or a URDF (.urdf) file into AGX Dynamics for Unreal, the result is a Blueprint containing the imported objects.
A key point is that regardless of a model being imported from an AGX Dynamics archive, OpenPLX or URDF file, everything is translated to AGX Dynamics for Unreal Components and Assets and can be used in the same way.
Warning
The resulting Blueprint, called the main Blueprint, derives from a base Blueprint named BP_Base_<GUID>.
This base Blueprint should never be manually edited.
If edited, the `Reimport feature will not work properly.
Any edits should be done on the main Blueprint or instances of it.
See Reimport Model for more details.
28.1. Import settings
When selecting AGX > File > Import Model to Blueprint and then specifying a model to import, the following dialog appears.
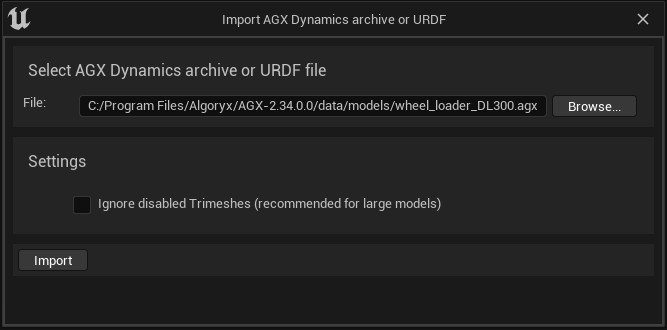
Import settings used during the import process.
By selecting Ignore disabled Trimeshes, any agxCollide::Trimesh that has collision disabled will not be imported.
Only its RenderData will be imported, if it exists.
This can be an efficient way to reduce the number of components created at import which can speed up the Blueprint Editor and reduce overhead.
28.2. Reimport Model
It is possible to reimport a previously imported Blueprint against the source file it was originally imported from.
This is useful for example when changes to the original source file has been made, but a complete, new, Import into AGX Dynamics for Unreal is not desired or appropriate.
The Reimport feature will attempt to update the Blueprint according to the selected source file but without removing user changes made in the Blueprint.
Warning
Data loss may occur during model reimport. The algorithm will attempt to keep user changes untouched but it cannot be guaranteed. It is recommended to use a version control or backup system for your imported models.
There are two main ways to access the Reimport feature from the Unreal Editor:
Right click the Blueprint in the
Content Browserand selectScripted Asset Actions > AGX Reimport Model.
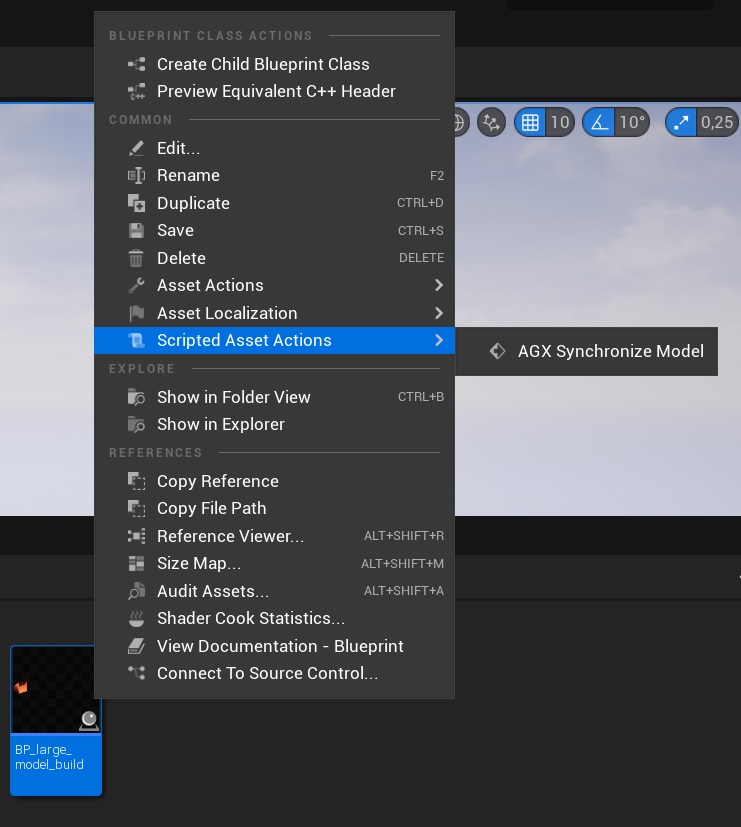
Accessing model reimport from the context menu.
From within the Blueprint, select the
AGX Model SourceComponent and klick theReimport Modelbutton.
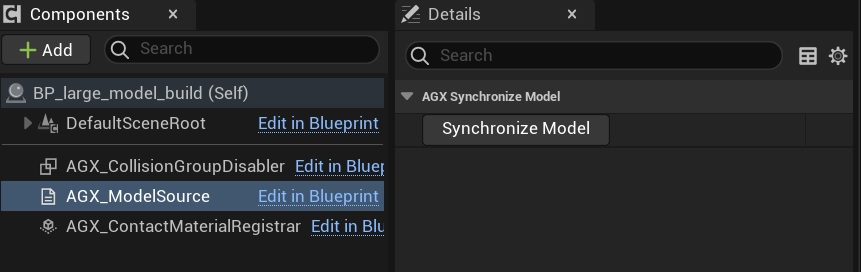
Accessing model reimport from the details panel of the AGX Model Source Component.
Note
This feature requires the AGX Dynamics objects to have persistent UUID’s between writes to the source file. This works automatically when using models created in e.g. Algoryx Momentum. If the model is created in any other environment, for example a Python or C++ program, consistent UUIDs must be provided by that program.
28.3. Runtime Import
AGX Dynamics for Unreal supports runtime imports.
Instead of importing using the file menu AGX > File > Import Model to Blueprint, one can call the Import function from C++ or Blueprint.
If the import is succesful, the Import function exposed by class AGX_AGXUtilities under category AGX Import returns a template Actor containing all Components representing the imported Model.
This template Actor is not yet instantiated in the World however and can therefore not yet be seen in the Level.
To instantiate the Actor in the World, call the Instantiate Actor function that takes the template Actor as input along with a Transform that will be assigned to the instantiated Actor.
It is possible to instantiate a template Actor several times.
The path to the file to be imported can either be an absolute path, or relative to the project root directory or stand-alone application root directory, as can be seen below:
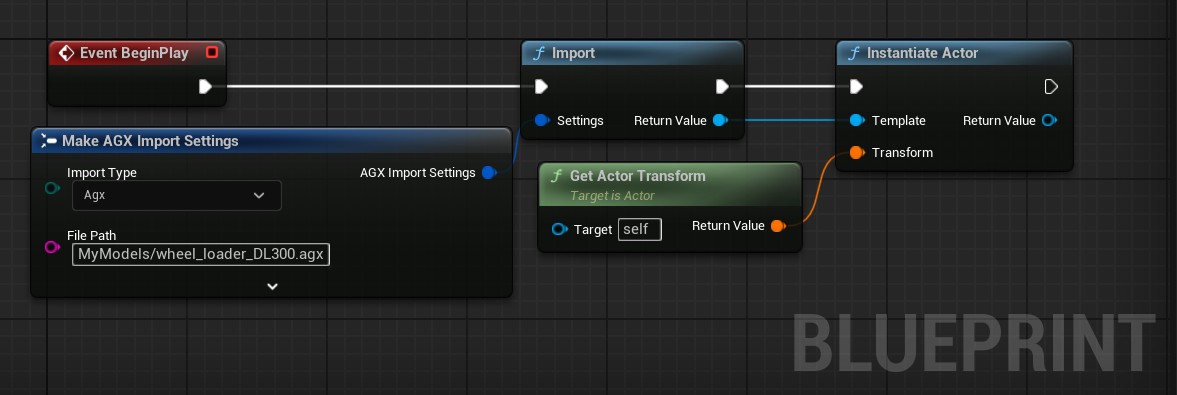
Importing a model during runtime.
28.3.1. Limitations
Due to an Unreal issue, any Static Mesh Components created during runtime import may have dual render material slots where the first slot (slot 0) is empty or WorldGrid, and slot 1 is the imported render material.
28.4. Importing AGX Dynamics Archives
The following screenshot shows an example scene with a wheel loader model.

An example scene consisting of a wheel loader model.
When importing the example scene to a Blueprint the following is produced:
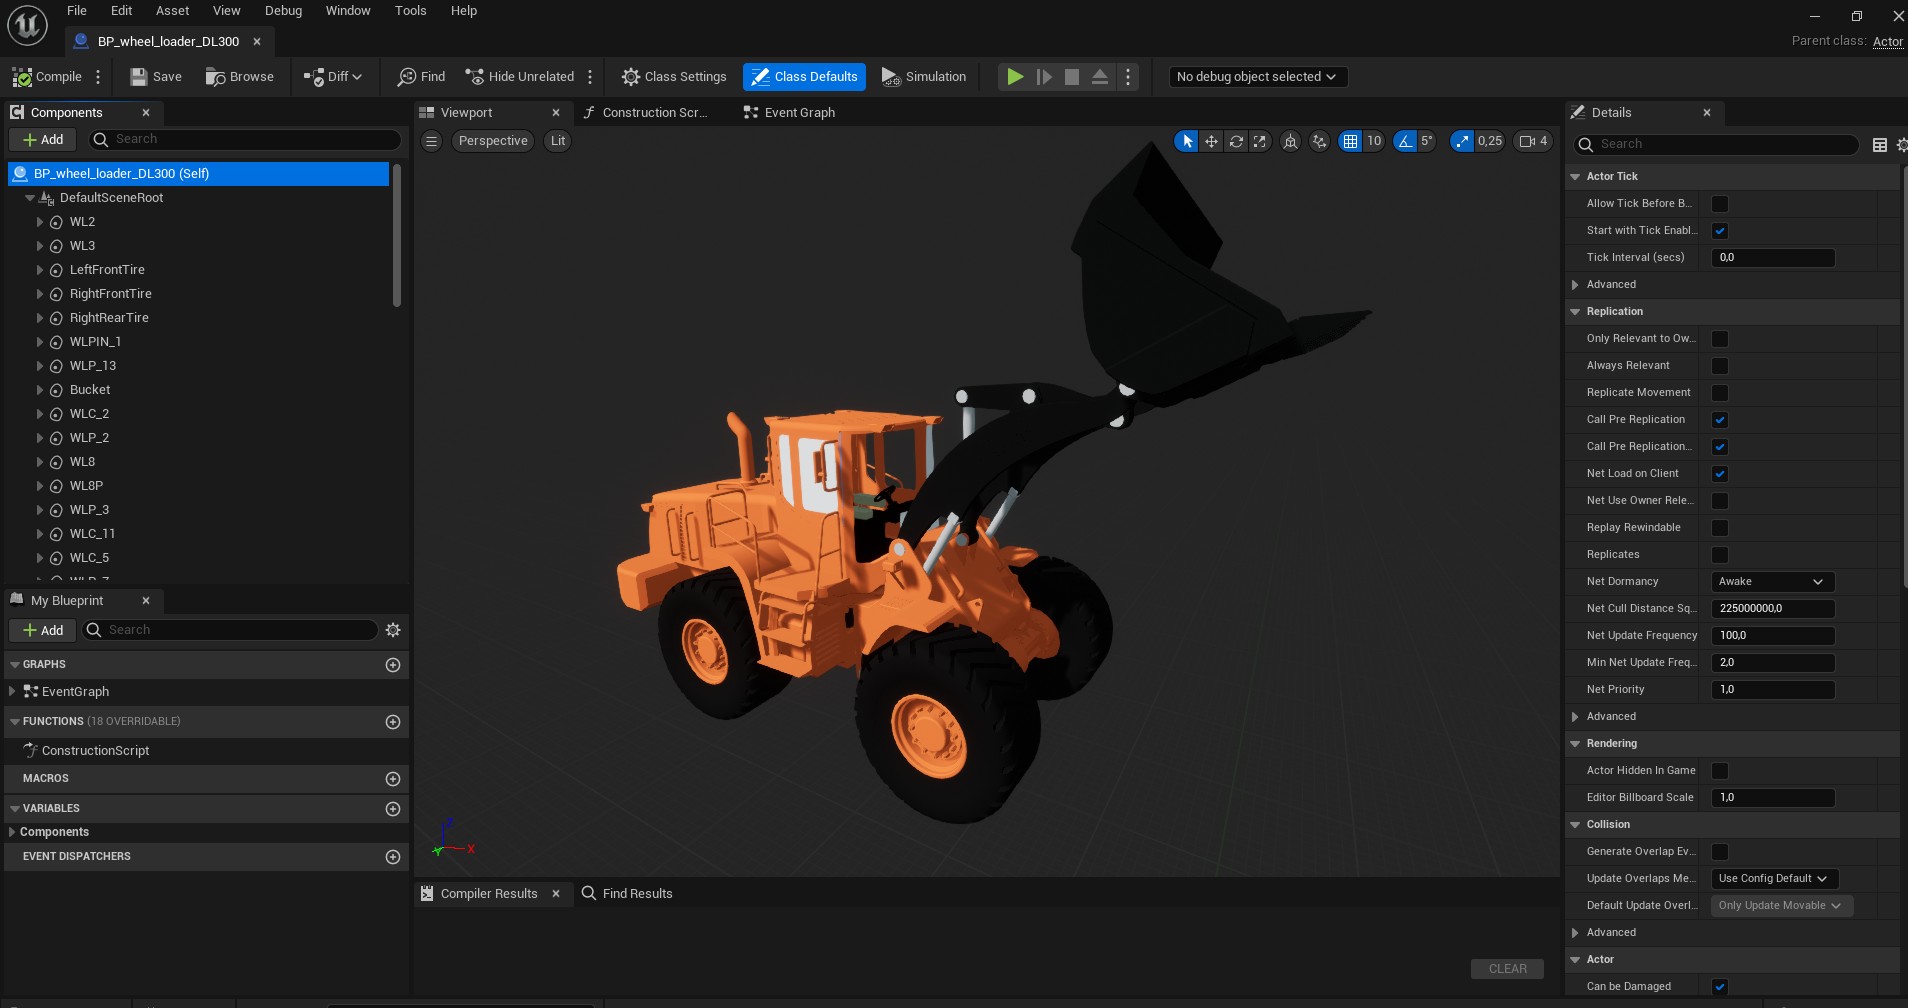
A scene with a wheel loader model imported as a Blueprint.
28.4.1. Wire and Track Import Limitation
For Wire and Track, the complete dynamic state of the model is not preserved when imported. For example, the velocities of each lumped node of a Wire will not be preserved during the import process, however the position of the nodes will be. The result of an import of any of these models will replicate the state of the original model as far as possible, but since the information about the dynamic state is not preserved, the resulting imported model can be considered to be at rest.
28.4.2. Models With no Import Support
The following models are not supported when importing from an AGX Dynamics archive (.agx):
Terrain
Height Field
28.4.3. What is Imported and What Isn’t
When importing an .agx file, only objects contained within that .agx file are imported, for example Rigid Bodies, Constraints, Materials, Wires etc.
Global settings such as gravity, time step or solver settings are not imported and will be ignored.
28.5. Importing OpenPLX Models
Importing OpenPLX models are done the same way .agx archives are imported, i.e. select AGX > File > Import Model to Blueprint and browse to the OpenPLX file to be imported.
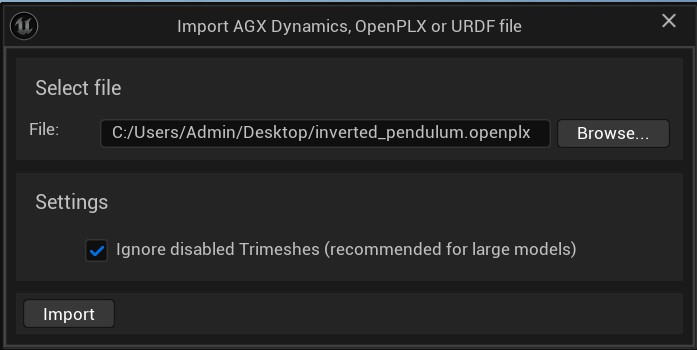
Import dialog during OpenPLX model import.
The first thing that happens when an OpenPLX model is imported is that a copy of the OpenPLX file along with any dependencies (for example .agx or mesh files) are placed in a <project_dir>/OpenPLXModels/<model_name> directory.
These files are what is then used during import.
The reason the files are copied to the Unreal project is that they are used in runtime, for example to map some objects (like Drive Train) as well as signals.
These files are also copied when building a standalone application so that they can be loaded in runtime.
These files are automatically removed if the corresponding imported Blueprint is removed.
To disable this behavior, see Edit > Project Settings... > Plugins > AGX Dynamics and Delete OpenPLX File Copy on Blueprint Deletion in the OpenPLX category.
To see where the corresponding OpenPLX file is located (as well as the original OpenPLX source file) for an imported Blueprint, see the Details Panel of the Model Source Component:
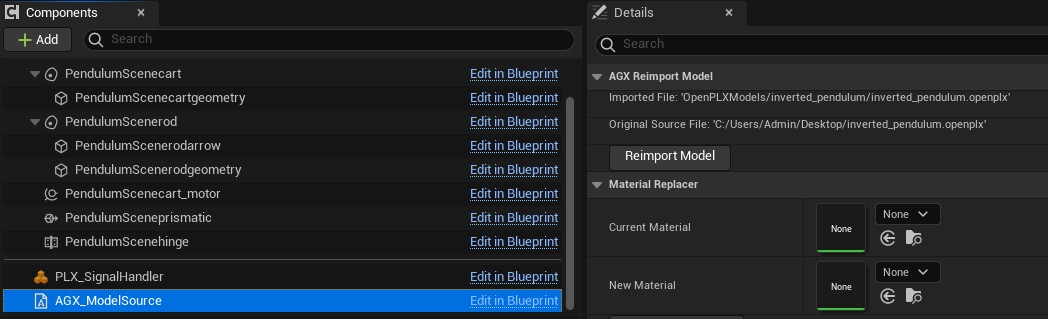
OpenPLX file location seen from the Model Source Component’s Details Panel.
The result of an import will be a Blueprint, similar to the result of importing an .agx archive.
The OpenPLX model is mapped to AGX Dynamics objects using the AGX Dynamics agxopenplx::OpenPLXToAgxMapper before being imported.
One important difference is that any Input and Output of the OpenPLX model can be accessed via the OpenPLX Signal Handler Component, see OpenPLX Signals for more details.

Signal Handler Component seen after importing an OpenPLX model.
Some objects, like Drive Train, are not added to the Blueprint on import. Instead, these are mapped in runtime at Begin Play. See OpenPLX Runtime Mapping for details.
See OpenPLX for details on how to simulate and control an imported OpenPLX model.
28.5.1. Limitations
All dependecies (such as mesh files, .agx files etc) must be located in the same directory or in a subdirectory of the .openplx file that is to be imported.
In other words, references to resources pointing to a parent directory, e.g. import @"../../../models/openplx/bulldozer.agx" as AgxBulldozer is not supported.
28.6. Importing URDF Models
When selecting AGX > File > Import Model to Blueprint the following dialog appears.
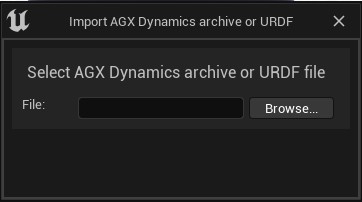
Import dialog.
If a URDF file is selected and it contains any filename paths, an additional URDF Package section is shown.

Specifying the URDF package directory.
The directory selected here corresponds to the package:// part of any filename path used in the URDF (.urdf) file and must match.
This is common when e.g. having mesh files that are used in the URDF model.
The figure below shows an example of this.

An example URDF (.urdf) file having package:// as part of a filename path.
Once the import procedure is complete, a Blueprint containing the imported objects will appear and can be used as normal.

After importing a URDF file, the result is a Blueprint containing the imported objects.
28.6.1. Limitations
The URDF import feature in AGX Dynamics for Unreal supports the same features, and have the same limitations, as the Algoryx Dynamics URDF Reader except for a few things:
- URDF’s
mimicfeature is not supported. - Textures from mesh files such as e.g. collada (.dae) files are not supported.
28.7. Modifying the Imported Blueprint
During model import two Blueprints are created.
The first Blueprint, placed within the Blueprints sub-folder of the model’s folder in the Content Browser and named with a GUID, is, and should remain, a straight copy of the source model. This means that no changes to this Blueprint should ever be made. This Blueprint is called the base Blueprint. The Components and Properties within the base Blueprint are used for comparison when performing a model reimport and the reimport may fail or produce incorrect results if the base Blueprint has been modified.
The second Blueprint, placed in the root of the model’s folder in the Content Browser and named after the imported file, is the Blueprint that may be modified and is used to populate levels. This Blueprint is called the main Blueprint. You may modify properties on Components inherited from the base Blueprint and add new Components, both from the AGX Dynamics for Unreal library of Components and Components provided by Unreal Engine.

Location of the main and base Blueprints after import.
28.7.1. Replacing Render Materials
Some Unreal Editor features make edits to Blueprints automatically. For example, the Replace References feature can be used to replace all usage of a render Material with another Material. If done to replace an imported Material then Unreal Editor will do the replacement on the base Blueprint instead of the main Blueprint, which means that if a Reimport is performed then the new Materials will be overwritten with the Materials from the imported model.
Since replacing render Materials is a common requirement the Model Source Component provides a feature to replace Materials in a way that is compatible with Reimport. From the Details panel for the Model Source Component, within the Material Replacer category, select the current Material that should be replaced and the new Material that should be used instead and click the Replace Materials button.
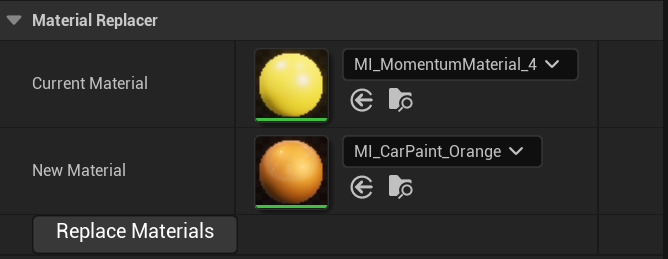
UI widgets in the Details panel for replacing all usages of a Material with another Material in a Blueprint or Actor.
This will update all Static Meshes within the main Blueprint and instances of that Blueprint that doesn’t already override the Material to use the new Material. This can also be done on a particular instance of the Blueprint to modify that instance only.
28.7.2. Modifying Imported Assets
No assets created during the import may be modified. If you need to tweak the Properties of an imported asset then create a copy of the asset and modify the copy instead.
28.8. Improving Blueprint Editor Performance
For very large models with several hundreds or even thousands of components, the Blueprint editor may be slow to react to user input.
One way to reduce the number of components of a Blueprint is to use the setting Ignore disabled Trimeshes during the import process.
See Import settings for more information about import settings.
To improve context menu responstime in the Blueprint Event Graph, it is recommended to de-activate the Context Sensitive setting shown in the image below.

By right-clicking anywhere in the Event Graph the Context Sensitive option can be de-activated.